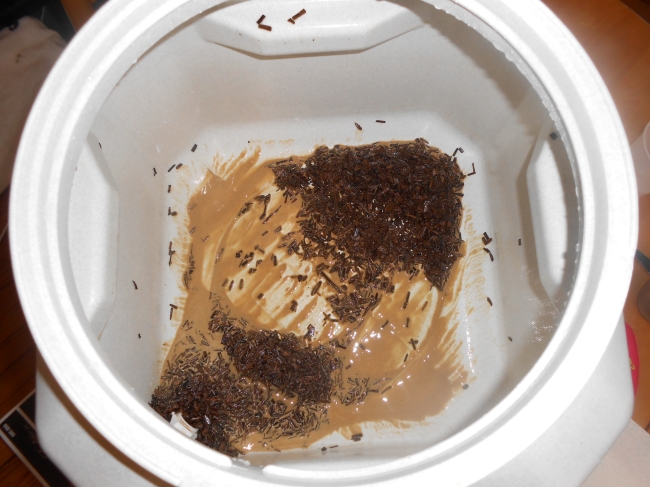
Chardonnay anyone? At this point the primary fermentation is done and the unfinished wine is transferred from the primary fermenting tank to the carboy (that’s a fun word isn’t it? It’s just a big jug). I first tested the specific gravity with my hydrometer. It’s supposed to read less than 1.010 before you can start the next phase. My sample read about 1.000 so it was fine. Specific gravity is a measure of the density of a liquid. The more alcohol, the lower the reading, so you can tell about the progress of the fermentation by the specific gravity. End of science lesson. You can read more about the hydrometer by clicking the link at the bottom of this post.
This step is simple, you just transfer the wanna-be wine from one container to the next, leaving behind the heavy sludge at the bottom of the primary fermenting tank. This is made up of dead yeast cells and the oak wood chips that you put in during the primary fermentation.
You don’t need to add any chemicals or anything at this point. I put an airlock in the top and let it sit at around 72 degrees Fahrenheit for two weeks. Yawn, boring. The next steps get a little more exciting.
Related articles
- The Hydrometer (michaelswine.wordpress.com)
- Zinfandel Kit, day 1 (beginnerhomewinemaker.wordpress.com)
- Some Important Wine Making Tips (wordsarticle.wordpress.com)


Now you’ve done it—I’m going downstairs to open a bottle (commercial) of chardonnay!
Enjoy! We have to wait another few weeks, but it really turns out very good. You basically get wine that is $15/bottle quality for less than $5 each so it’s a good deal too.
DIY wine looks a tad repulsive. Did you crush the grapes yourself? What does it smell like? And when does it age in the oak barrels? My friend’s son was making mead in their garage when I last visited. It was super fermented and tasted terrible, almost to the point of my needing to chow down half a roll of Tums, but on some level, I was impressed with his effort.
Good questions! It looks so nasty because all of the yeast is suspended in the liquid. In the next step I add chemicals to kill the yeast and clear the wine. All of the gross stuff precipitates out and it actually looks drinkable. I don’t crush the grapes but buy special concentrated juice from varietal grapes. The juice itself costs 100-200 bucks and makes about six gallons of wine. Some people who are less lazy than me do buy actual grapes and crush them. The juice smells wonderful. As the yeast goes to work it first smells like bread, then sweaty feet, then finally like real wine. Oak barrels are optional, and friggin expensive. For the kits, you accomplish the “oaking” by soaking these super-special french oak chips in the wine as it ferments. One interesting thing I did learn is that not all wine is aged. Most commercial white is produced very quickly and actually has to have preservatives added to keep it from spoiling. Homemade wine uses much less preservative and this is one of the reasons it comes out so good (the finished product really is quite excellent), though I wouldn’t want to try it right now, yuck.
I hope you do a wine tasting post.
Honestly I don’t really drink, but I do have a taste from time to time. My wife is more the expert in that area, I just enjoy making it. Weird?
I love wine, but I’d never make it myself. So maybe there’s something perversely normal here. Or maybe not.
“Normal” is not in my vocabulary! 🙂
Are you familiar with Frank over at A Frank Angle? He’s a Cincinnati-based longtime WP blogger who loves wine, handbells, science, he does classic cartoon posts on Saturdays (but he’s taking a break from doing those until next year) and frequently posts fun YouTube videos. He’s a good guy. I urge you to check out his site if you haven’t done so already:
http://afrankangle.wordpress.com/
I’ve been blogging for about three weeks, I need more peeps to follow, sure!
Then pay him a visit. His current post is much longer than his usual posts. This one’s an aberration.
Fermentation is always good. I’m more of a kimchi, kraut and bread doughs gal. Rock on with the invisible creatures that keep us healthy.
Pingback: Home-Made Wine From a Kit: Degassing, Stabilization, and Clarifying | The Dark Chalice